
Hello! Welcome to the middle of the week! We had off from school for Rosh Hashanah yesterday and Monday (Happy New Year!), so today feels like a Monday to us. With that in mind, I wanted to share a project I've been working on, and see if you have any ideas for me.
You know our kitchen island? It's from IKEA's discontinued Varde line, and it's been incredibly useful in our small galley kitchen. A large expanse of countertop plus 12 drawers = function galore. But can we talk about the form? 'Cause this baby is fugly. U-G-L-Y, you ain't got no alibi, you ugly.

Butcher block makeover
Yo mama says you ugly. (Yes, this is happening). This guy was pretty beat up when we got our hands on him, and the top has looked like total crap from day 1. Look at it. Total crap. So, I did what I often do, and thought about it a lot before I finally got around to shaping this puppy up.

Butcher block makeover materials
I read up a lot online about refinishing butcherblock, and check with my pro-contractor dad, and in the end felt confident to tackle this myself. My materials list included:
- Electric sander (I have this Black & Decker)*
- Eye protection (safety first!)
- Medium- and fine-grit sandpaper disks
- Paint for the base (more on that in a sec)
- A firm foam brush paint roller (I buy on Amazon in bulk for cheap)
- Wood conditioner, stain, and Polycrylic or conditioning oil
- New hardware (black knobs I've been hoarding since I found them on clearance at Target)
- A variety of coverings for the drawer fronts

Refinish butcher block minwax pre-stain

refinish butcher block minwax polycrylic
Let me put the ''before" and "during" photos up side by side so you can see the differences.

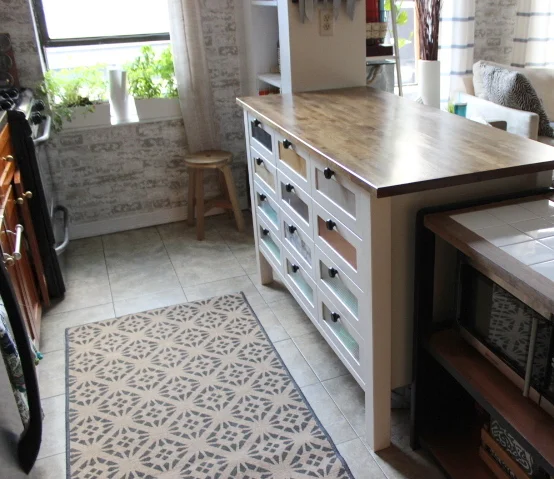
I started off by painting the base. I got suuuuuper lucky when perusing the "oops" paint at my local hardware store when I spotted a small can of creamy white that I was pretty sure was a perfect match for these drawer fronts. It was! It really, really was! Just goes to show that awkwardly loitering the paint aisle pays off. I'm not normally super-crazy about a creamy white, which I typically eschew in favor of a pure white, or even a nice glossy black. But I didn't think that trying to paint the drawers would turn out well, and once I found the creamy white and painted the whole thing, I was amazed at the difference. It's slightly more "farmhouse" than I might have gone for, but I still think it looks incredible compared to the yellow wood look from before. Next up: the top. I loved the super pale, clean look of the freshly sanded butcher block. (Look at the photo of wood conditioner, above, for a good idea of that color). I also thought it looked very Scando-modern, dahling, which I've been beaten bloody by IKEA to love. But once oiled, it looked too yellow for me.

See how it's yellowish? I also hadn't applied enough coats of conditioning oil (not to be confused with pre-stain wood conditioner, but instead a wood oil specifically for butcher block that I got at IKEA), so it started to look beat-up again pretty fast. So... I re-sanded the whole darn thing and started over, this time conditioning the wood with the pre-stain conditioner, and then reaching for the can of Special Walnut I keep around.

Special Walnut stained butcher block no sealant
Mmmmm. The darker stain definitely combines with the creamy white paint to create a more farm-y vibe, but it's cool. I grew up in the heart of farmhouse chic, and I can handle a dose of it in my own kitchen. (PS - check out the photo above for how close a match my oops paint is to the drawer fronts. Pretty grood, eh?) After two coats of Special Walnut, I applied five thin coats of clear satin polycrylic, lightly sanding with fine-grit sandpaper between each coat.
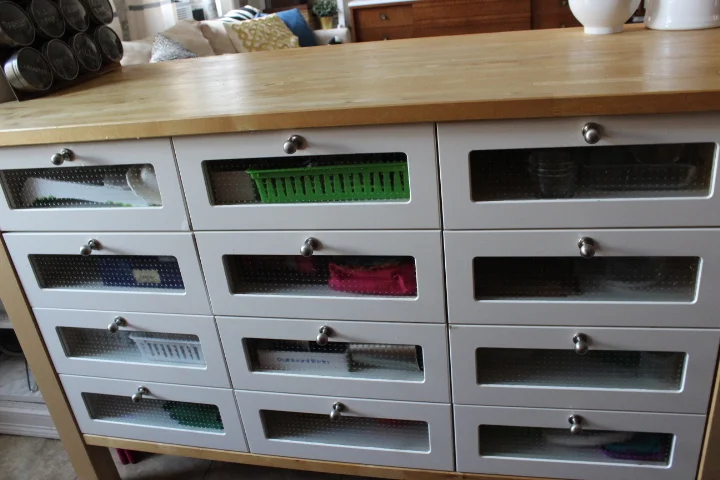
The result is a lovely, shiny, hard top that I am DIGGING. I mean, I'm practically purring and running my hands over it every time I walk by. And I have yet to allow anyone to so much as set a cup on it, so that's really upping the function factor around here. But what, you might be asking, is up with those funky drawers? Well. If you scroll back up to the "before" shots of this beaut, you can get an even better idea of just. how. tacky. these clear textured drawer inserts are. Not only are they ugly, but they allowed a partial view into the drawers themselves, which doesn't exactly make for a clean, cohesive look. Also, they are ugly. So I wanted to cover these babies up, and I figured my second-favorite-DIY-tool (yes, Con-Tact Paper) would do the trick. I busted out all the types I had on hand and hurriedly pasted them up, and I've been living with them like this while I decide which is best.
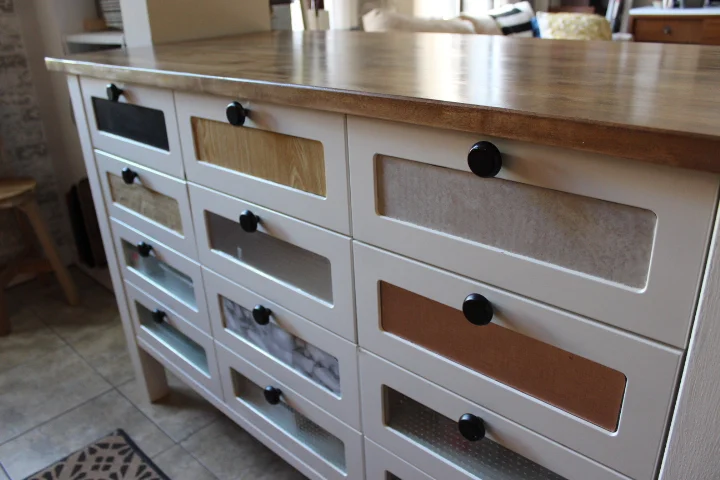
Enter you. Any thoughts on which drawer front covering is best? We're working with, from left to right, top to bottom, plain black, light wood grain, Formica-like (sexy!!), grass-cloth, stainless steel, copper, and gray-ish marble. Here're some closeups for ya.


I, of course, have me some druthers. I think I've ruled out the copper and stainless because the texture of the glass is too obvious underneath them. The lighter wood grain is out because it clashes with our new dark stain. I like the Formica-style one, but a friend says it looks like cheap cardboard. The marble - even this garish, cheap sample of it - looks pretty nice, but does that just seem silly? Like, you would never have real marble drawer fronts because they'd be too heavy, right? So then does it look automatically fake? I'll all about the realism, y'all. I love the grasscloth-look, but it's actually wrapping paper, not Cont-Tact paper, so I'm worried it would disintegrate under the abuse of spilled smoothies and sticky hands. In short, I like the black. But what say you? Any thoughts? I'm dying to hear! I also need to repair the drawers where the surface is coming up, and replace the top three knobs, which I accidentally sanded the second time I sanded the butcher block down. And don't worry about the bubbles you see in the papers; this was a quick-and-dirty job to see what was worth the actual work of doing it right.
So that's it for today! Thanks for stopping by. If you missed it, here's the last kitchen cart makeover we did....just last month!
*I'm an Amazon Associate, which means if you click through this blog and purchase something on Amazon, I receive a small percentage of the sale price. I only link to products I recommend, and I thank you for supporting the work that supports this blog!